Sunday, March 1, 2015

Classroom Benchmark Timeline

Back in the Swing of Things
Wow!  It's been a crazy couple of months years.  Lots of changes happening in RW&BT's life, not the least of which was a change in teaching positions.  I now teach 6th grade science and social studies to 70 amazing students who have given me loads of new blog post ideas!   

New Beginnings
I love everything about my new job!  One of the most fulfilling moments for any teacher is that "light bulb moment" when the stars align over a student's head and you are finally connecting them with real knowledge and understanding. These are the moments we live for, right?

Necessity.. the Mother of Invention
One tool that I use to put the past into perspective is my Classroom Benchmark Timeline that I created out of simple necessity.  As we know with our children and our students, they think that anything that happened before they were born is ancient history.  When we are discussing dates in history their eyes tend to glaze over and without a concrete establishment of time I found myself losing them.  To them, all the dates seem to run together; the centuries meaningless. 

How We Use It
So I decided on 10 important dates in US history that I could use to mark the dates we are discussing at the time.  For example, we were just recently discussing Martin Luther King, Jr. and the date of his assassination came up.  I quickly went over to the timeline and pointed out where on the timeline it would have fallen.  They saw where that piece of the puzzle fit into the overall course of our relatively recent history and there went their light bulbs!  They were then discussing how this took place after JFK Jr. was assassinated and before this or that. 


Why Dates are Important
I recognize that there has been a shift away from memorization of dates towards a more holistic understanding of our country's past.  However, I think that this will come back to haunt us as a society as we graduate generations of students that have no clue or context about what happened before they were born.  One only has to watch a Jaywalking segment to know that we are already in trouble.  Yikes!

Cultural Context
Below each main event on the timeline I also included several other fun or silly events that have taken place over the course of that year to help aid in their understanding of time period and context.  I found this works best when we use it regularly and I think it could help to have a designated student(s) whose job it is to point out and locate the date in question on the timeline.  I would call them "Timeliners."


How did you put this into place in your classroom?  Let me know in the comments!  I would love to learn from you!

RW&BT

Friday, August 16, 2013

My Favorite Fundraiser!

 My oldest child is about to enter high school this fall and my youngest is entering 5th grade, her last year at the elementary level.  sniff.  sniff.   After working with the parent organizations at their schools for nine years, I have great appreciation for the hard work and dedication that goes into supporting our schools and our teachers.  However I have a special appreciation for the person responsible for putting together the school fundraiser.  This person is tasked with the awesome duty of coordinating, scheduling, managing the school's fundraising efforts.  It is often the parent of a young student because parents of the older students frankly know better than to volunteer for this incredibly time-consuming, often thankless, volunteer position. :)  Don't get me wrong, I understand first hand the need PTAs and PTOs have for these big financial pushes as it sets the stage for all of the events and activities that happen through the course of the school year.  But I have found that many schools don't eagerly pursue money that is quite literally sitting on the kitchen table!


When my son was born I started saving Box Tops for Education.  Actually, I probably started to save them while I was pregnant.  Either way, when he entered Kindergarten, I was able to send in over $37.00 worth of Box Tops.  I was diligent about the program and clipped them off the top of the Cheerios box with a vengeance!  When it came time to fill the Box Tops for Education Coordinator position at a PTA meeting later that year, I was more than happy to volunteer for the job.  That was 2005.  Fast forward to 2013 and I have been the Box Tops for Education chairperson at not only my child's school but also at every school I have worked at.  My entire family has spent time cutting out these little gems and everyone knows better than to throw away packaging with the BT still attached.  Mom will go crazy!

Being the Box Tops cheerleader that I am, I thought that sharing some of my fun collection strategies with you could help you to fall in love with this program as well.  Disclaimer: I love a good deal and I understand money is tight in many families.  Even I will purchase the generic version of a product in lieu of the Box Top decorated product (especially since a box of cereal doesn't last as long as it used to anymore) so please don't think I am advocating everyone should go buy more BT products!  That's Box Tops job, not mine.  You see, my strategy has been to increase awareness among people who don't know about the program or who are less inclined to cut them out and bring them in (you know, the bigger kids who are "too cool" for this stuff anymore) to order to increase a school's Box Top totals. 

To that end, behold the Box Tops Classroom Vault!

My family was forced to eat a lot of chips for mom's latest project at school but they were understanding and were willing to put in the hard work needed to get the job done.  :)


Here's another example of a vault that I made for my children's school.  Having the room number on each vault was helpful but not necessary.  The important thing is that each classroom has a visual reminder of what they're supposed to collect and a place to hold them.  It's one less thing for the teacher to have to deal with and THAT is always smart.  One thing that IS important, however, is that you make sure each teacher understands that the vault stays with the classroom and doesn't travel with them to other classrooms or worse, other schools.  After all the hard work you put into getting uniform containers, the last thing you want to do is have to replace one that's missing a year later.  On that note, it's always a good idea to make a couple extra, just in case!

This container previously held caramel covered popcorn.  I loved the fact that it was clear so I could instantly tell if I needed to collect from it or not.  The wide mouth also made it easy to pull everything out.  The downside of this particular one was the cost of the caramel covered popcorn.  At $3.99 each, it was a pricy project (I needed about 12 containers) which is why I chose the chip container above the next time I made them.

One of these canister is placed in each classroom so that students have a consistent, designated container in which to shove their donations.  I have also found that by doing so, students are more apt to recognize the Box Tops logo on products at home.  Having a consistent container decorated the same throughout the school is also extremely helpful when student volunteers visit the classrooms for collection at lunch or after school.  The kids know exactly what to look for and  are less likely to disrupt the teacher.

Another extremely helpful tool I have found is a board profiling some of the brands that Box Tops can be found on.  I know the website does a great job of announcing new products and items that carry the BT logo but something that can be placed near the school office to be seen by parents milling around isn't a bad thing either.


I've traveled to Minneapolis in order to attend Box Tops University that is so generously put on by the General Mills company.  For a Box Tops junkie like myself, it was heaven!  I left with loads of samples and tons of great ideas for my school.  If you ever get the chance to attend one, I would highly recommend it!

I hope that these ideas inspire you to seek out more of these little buggers.  Once more people are aware of the program, they are more than willing to save them for you.  This last year at my school we were able to increase our Box Tops haul by more than 400%.  One of the best moments of the year was when I attended the parent/teacher meeting and announced that our total haul for the year would be almost $2,000.  This could not have come at a better time as everyone in schools knows, the end of the year is often filled with extra requests for funds and our school was no different.  Where some requests were going to be turned down, they were now going to be granted.  That was a great feeling!

What other fun and engaging ways do you have to increase your Box Tops haul?

 RW&BT

Monday, August 5, 2013

Did I say it was time for some serious blogging?  I meant PAINTING.  Turns out I couldn't resist my Pinterest pins on my KitchenReDo board any longer and gave in.  Many teachers out there will understand and sympathize.  There is a small, very small, window of opportunity to begin (and sometimes finish) home improvement projects on a teacher's calendar.  You see, there is about a two or three week period of time between the end of summer school and the start of school supply sales that I usually tackle a time consuming project that couldn't be done otherwise.  To prove my point, you will find proof below of several summer projects that I have engaged in over the course of the last three years or so.  We absolutely love our 100-year-old house and wouldn't think of living anywhere else.  However, we can live without wall-to-wall carpeting, industrial ceilings and archaic range hoods.

It's fun to note that it is usually during these times that we eat more take-out and frozen pizzas than any other time of the year.  Not that I am known for my culinary expertise (see below) but when I am in the middle of a project I don't stop to make food.  Thank goodness my two kids are old enough to not only make themselves cereal or a PB&J, but the 13 y.o. has recently learned how to broil hamburgers in the oven.  SCORE!

Now, for a trip down memory lane...

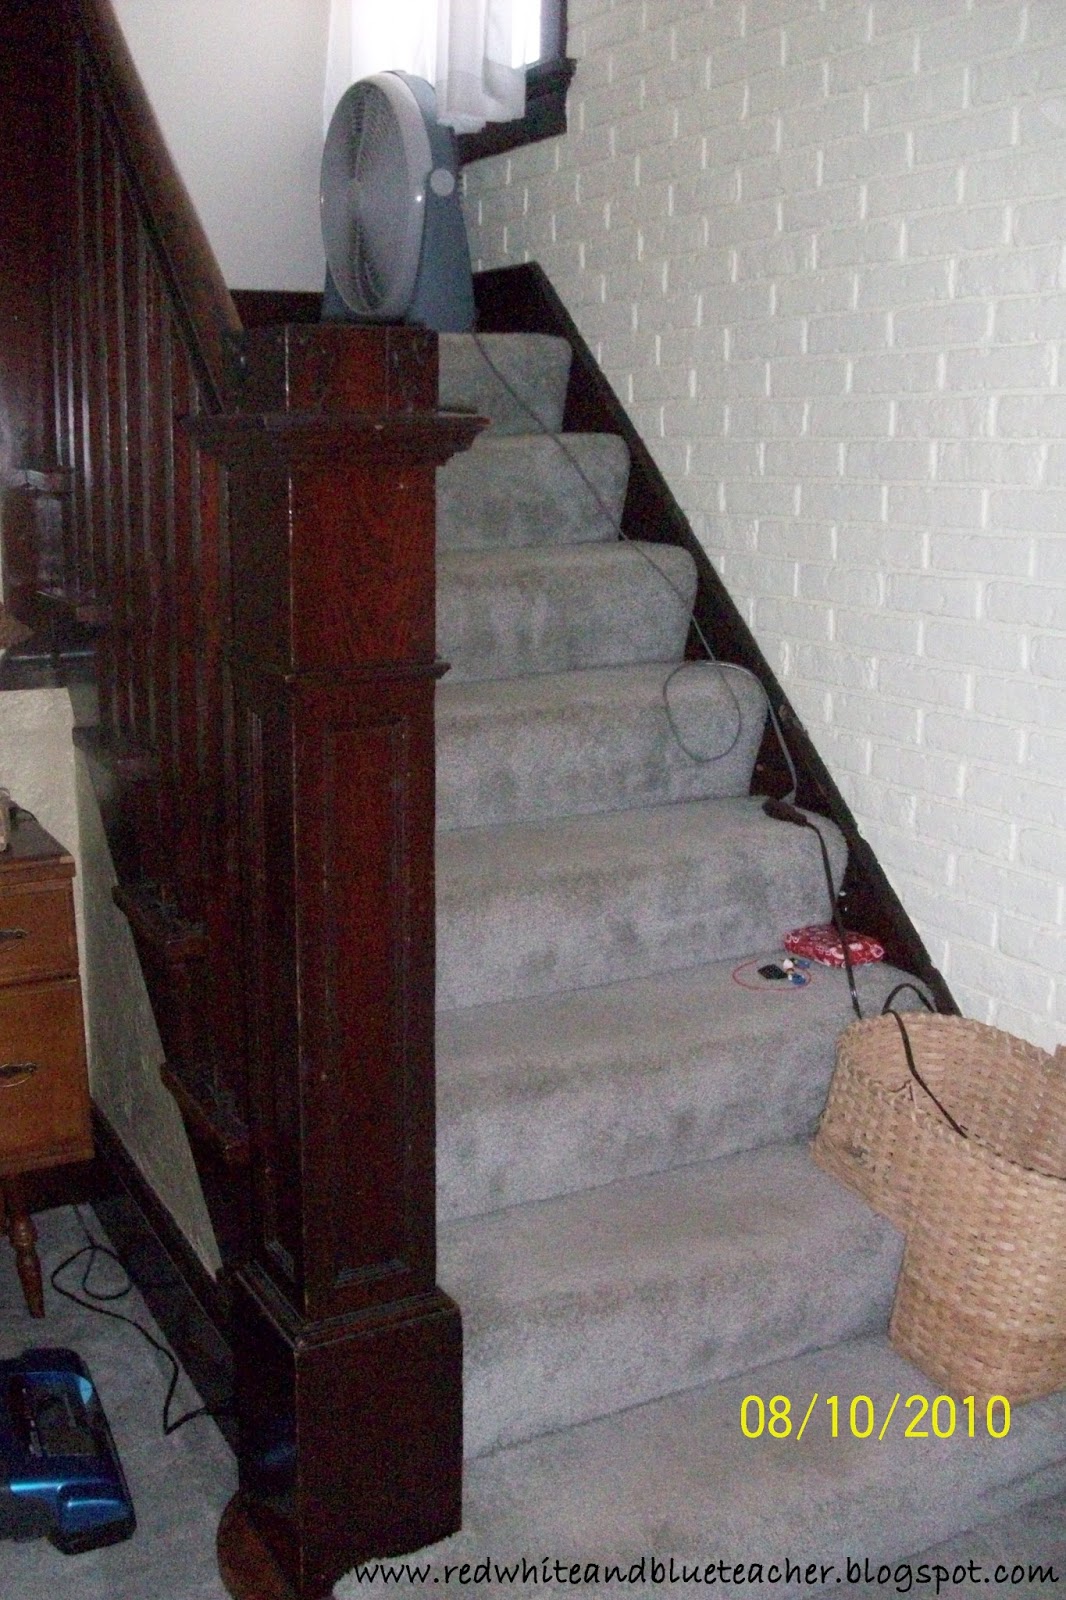
In 2010, my husband came home from work on a sunny summer day to find that I had ripped out the carpet on the stairs.
The carpet was about 28 years old and from the pictures it was still in "decent" condition but it was gray carpet.  We have two kids and a five-year-old Viszla.  This was not going to remain gray for long.


This is before I tackled the refinishing.


In 2012, I ripped up the carpet on our first floor to reveal hardwoods in need of refinishing.  Have I refinished them yet?  Nope.  Only had time to rip out the carpet, scrape the boards below, wash them and put it all back together.  Then it was time to shop for pencils!
 

Two years after the steps, I finally decided to yank the carpet in the foyer, living room and dining room.


After the carpet was removed we discovered some awful tiles that had to be scraped off.  Don't look at the floor begging to be refinished.  Look only at the stairs.  Aren't they pretty?


In 2011, I removed an ugly ceiling in our office to reveal wooden boards that I was not courageous enough to remove so I just painted them a pretty green.  By the time I put it all back together it was time to start shopping back-to-school sales and I didn't have time to install a new light fixture.  Three years later we are still operating with a plug-in lamp. 
 

Ugly industrial ceiling had to go!


Still not the prettiest but a lot less commercial. 


Of course most people choose this sweet spot in the summer calendar to VACATION, but not me!  My poor family will never know the true meaning of summer vacation... 


Anyway, fast forward to 2013.  I started taking the kitchen cabinet doors off on Monday and my (sweet, adorable, super patient and tolerant) husband was putting them back up on Friday night.  He texted me pictures of the final look while I was at the big box store picking out wall colors and I made the paint worker man look through the "before and afters" on my phone.  He was thrilled, I'm sure...

Now please understand that the yellow cabinets are the "after." 

AFTER                                                                                BEFORE


The cupboards were in great condition but needed a facelift.  I was very, very scared to tackle this project.  In fact, as my daughter and I were walking into the home improvement store I asked her, "Do you think I can do this?"  She was surprised by my hesitancy but assured me it would be no problem.  I was envious of her 10-year-old optimism but in the end it turned out better than I could have hoped for.  Technically we are still not done as we have tile for the backsplash that is waiting to be installed.  I'll be sure to post pictures when that is finished.  

AFTER                                                                                  BEFORE


The appliances will slowly be converted to shiny new stainless steel as we can afford it.  For now, we are thrilled with the new range hood.  The kitchen was last remodeled in 1979 but the range hood was the only appliance that hadn't been updated in the last 34 years. 

AFTER                                                                            BEFORE


I thought that with a new look I would like to cook but alas, that is not the case.  However, it makes drinking a glass of wine while watching the hubby cook much more enjoyable!

Watch for more kitchen pictures to come.  (I'll try to make sure they're not so blurry.) We still have to decide on window treatments but since it took me over a year to decide to take the plunge on THIS massive project and two months to choose a color, I predict window treatments and wall decor around Thanksgiving break.  


Now, it's time to go hit some school supply sales!!!  Eek!  I can't wait!  I ♥ stacking looseleaf paper in my cart next to stacks and stacks of spirals.  By the way, how come kids don't call them spirals anymore?  The first time I ask them to "Take out your spiral" they look at me like I just arrived here from another planet.  I have to clarify, "Your NOTEBOOK.  Take out your notebook!" lol

Hopefully my next post will have something to do with teaching... :)


RW&BT

Saturday, July 20, 2013

First Grade Fun!

Whew!  Summer school is completed and now it's time for some serious blogging.  I am thrilled to have a place to share the stuff that I've made to make my own teaching life easier and I hope that those of you who read this will enjoy it as well.

I've taught math and reading Intervention to students in first through 8th grade.  I have amassed a lot of tips and tricks that are not only useful but simple and practical.  I've often thought to myself in the middle of a lesson, "What I really need is ___________ !"  I would often write a note to myself and proceed to make such item later that day or week.

One of the most valuable tools when working with my first grade math students has been my ten frame flash cards.  Click on the link and you can pick them up from my store at TpT.  They are big enough to be used as a flash card for a small group but easy enough for kids to handle on their own if working with a partner.  They are printed on index cards (trust me, most home printers have the ability to print on index cards, think of them as a smaller envelope if you will) so they're sturdy enough and don't need to be trimmed.  Yay! However, I would definitely laminate them if you plan on using them often.  I would also plan on making several sets of them because they could turn into not only a tool for teacher led lessons but also you could plop these babies in a math center and have the kids write out their math sentences using the cards.

Sample ten frame card.


I will use these in several ways.  When we are learning to identify the dots on a dot cube, I often will teach them to recognize the dots in a ten frame in the same manner.  Once they can tell me what number they see, I work in different questions.  For example, when I flash the nine card as above, I would ask, "How many more would I need to fill my ten frame?"  As the kids become more fluent with identifying their numbers this way, I step up the expectations and ask them to recite just the number of dots that are missing.

After a time I will then combine both existing dots and missing dots into an addition fact for them to recite to me ("Nine plus one equals ten!") but that usually takes a couple of weeks to build those skills.The kiddos get used to associating nine and one together which is a precursor to my lesson on combinations that make ten which I call, "Best Friends."

Best Friends is the idea that numbers like to be with other numbers, just like kids like to be with their best friends. We learn how 9 really likes 1, 8 really adores 2, 7 is thrilled with three, 6 is wild about 4 and 5 and 5 are not only Best Friends, they're twins!  Having this vocabulary and these number combinations come in very handy later on when kids are having to mentally combine larger numbers.  For example, when they are trying to figure out 24 plus 7, I teach them that the 4 in 24 really wants to be with a 6.  They pull a 6 from the seven to make the next ten (which is 30) and are left with 1.  30 + 1 is easy peasy and they never needed to get out a paper and pencil!


I wish I would have had these strategies for mental math when I was in school.  They would have saved me a ton of time.  Sigh.

How else would you use the ten frame flash cards?  Let me know in the comments section because I'm always looking for new ways to reinforce the concept of ten with my kiddos.

Enjoy!
RW&BT


Sunday, June 30, 2013

Pencil Bouquet for the Teacher

Another Favorite Thing!


Back before I finished my teaching degree, when my own two kids were younger, I wanted a cute back-to-school gift for their teachers that didn't cost a lot of money.  I've made these for several years now and even made one for my own classroom now that I have one!  If you time it right, and get your pencils on sale in late July, this project is very cost effective.  In fact, I refuse to purchase pencils at any other time of the year - stocking up during the summer has proven to be incredibly easy on the pocketbook.


By covering a metal coffee can (or an unused paint can from a craft supply store) with scrapbook paper and stickers, you can create an adorable way to display a collection of newly sharpened pencils for a new favorite teacher.  I suppose the pencils don't HAVE to be sharpened but let me share with you the following anecdote.  When presenting this gift to my daughter's teacher a few years ago, she was obviously happy to receive it.  However, she reached in and took one out and exclaimed, "OH!  They're sharpened!"  Her face lit up in a grin.  That was a great moment.


Here's a tip: When you're at the craft store, you may want to invest in a section of foam to be put into the bottom of the paint or coffee can to cushion the pencil tips.  You can have the store cut you a section so that you don't have to buy the whole big slab.  If you have an old mattress topper lying around you could cut that as well.  In fact, if you used a mattress topper I bet the pencils would be lifted up at different levels created more texture and dimension.  Hmmmmm... might have to try that.


One of my biggest pet peeves in any classroom has always been the sound of the pencil sharpener.  Manual or electric, it doesn't matter, I don't like that noise interrupting the work going on in my classroom.  Having a supply of sharpened pencils that are accessible to the students completely eliminates the line that can form at the sharpener as well.  Having a super cute place to hold them is just a bonus.

Adding colorful pencil toppers (find them at a dollar store) adds a certain flair but could have an adverse affect.  It might make the teacher reluctant to share them!

Have a great week!

RW&BT


Sunday, June 23, 2013

My favorite things...

Welcome to Red White and Blue Teacher!

I've been teaching various grade levels as an Interventionist for five years and have spent a lot of time making and creating fun bulletin boards, products and manipulatives for my students and I'm super excited to start this blog so that others may also get some use out of my stacks o' stuff.


I thought I'd start out with one of my favorite things...


These silhouettes were a gift from my mom for my birthday a couple of years ago.  I suppose technically they are supposed to be used as stakes in a garden but I much prefer them in my windows!  You can grab yourself a pair of these cuties here!